Setting up a Windows Server Active Directory environment from scratch
11 minutes readSeries: Windows
Introduction
Active Directory is Microsoft’s directory service that runs on the Windows Server operating system and enables administrators to manage permissions and access to network resources, allowing organizations to easily manage users and computers in a Windows domain-type network.
In this post, I will deploy Windows Server 2022, promote it to a domain controller, design an appropriate environment, and setup Windows client virtual machines.
I have decided to learn Windows AD to deepen my knowledge of Windows Servers and their services since it’s a critical skill if you want to pursue your IT career.
Hardware and Setting Up
To deploy the Windows environment, I will use my home Proxmox server, which has the following hardware specifications:
- AMD Ryzen 5 1600 6 core 12 thread processor
- 64GB DDR4 3200MHz (2x 32GB) RAM
- 1TB NVMe SSD (OS)
- 120GB SATA SSD
- PCIe 2 port 1 Gigabit network card
- RTX 3060ti
I will create three virtual machines: the first one will be Windows Server 2022, and the second and third will be Windows 11 client VMs, which will be joined to a domain network.
Since I have other virtual machines and containers running on my Proxmox server which are using hardware resources, I will allocate the appropriate optimal resources to Windows VMs.
Windows Server 2022
Proxmox Wiki has a good write-up for Windows 2022 guest best practices.
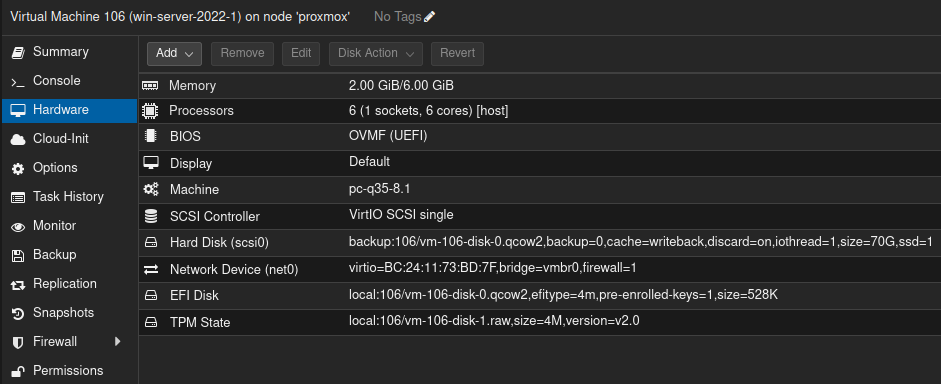
For Windows Server 2022 virtual machine I allocated the following resources:
- 6 threads, host CPU
- 6GB of RAM with minimal memory set to 2GB
- Controller: VirtIO SCSI single
- 70GB disk, SCSI bus, qcow2 format with writeback cache, IO thread and discard turned on
- OVMF (UEFI) BIOS
- Machine: q35 v8.1
- TPM v2.0
- VirtIO paravirtualized network device
This is how my Windows server virtual machine hardware page looks like on Proxmox:
I obtained a Windows Server 2022 ISO from Microsoft’s evaluation center. After registering for a 180 day evaluation I could then download the ISO file which I have uploaded to my PVE server and added it to the virtual machine as a bootable CD/DVD Drive.
You need special Windows VirtIO drivers if you’re installing Windows on a KVM hypervisor to allow dirrect access to the paravirtualized virtual machine’s devices and peripherals. I have downloaded the VirtIO drivers ISO, uploaded it to PVE server and added it to the virtual machine as well.
KVM configuration for the virtual machine is done and now I can proceed with the Windows Server 2022 installation. When installing I have chosen the Windows Server 2022 Standard (Desktop Experience) edition. After the installation was completed, I have updated the system with Windows updates.
Windows 11 Workstation Client
Since my Proxmox server has limited disk space, I decided to use the unofficial Tiny11 ISO which is a debloated Windows OS that only uses around 8GB of space.
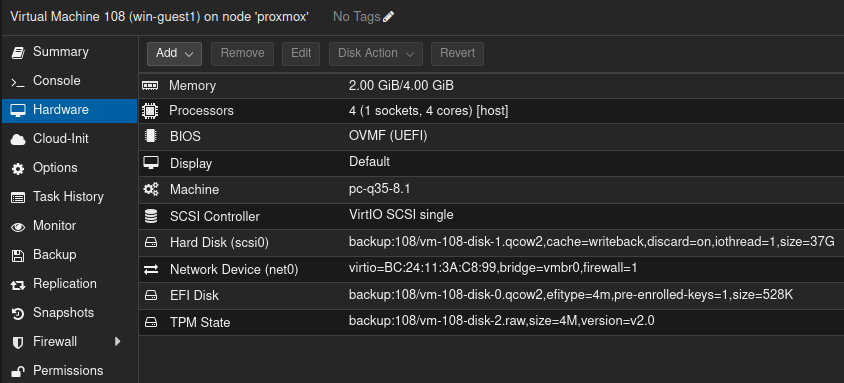
The resources allocated to this virtual machine are:
- 4 threads, host CPU
- 4GB of RAM with minimal memory set to 2GB
- Controller: VirtIO SCSI single
- 37GB disk, SCSI bus, qcow2 format with writeback cache, IO thread and discard turned on
- OVMF (UEFI) BIOS
- Machine: q35 v8.1
- TPM v2.0
- VirtIO paravirtualized network device
Here is the Proxmox hardware page of a configured virtual machine:
Once again, I have added the Tiny11 Windows ISO and VirtIO drivers as a CD/DVD drive and proceeded with the OS installation. After the installation finished, I have updated the system.
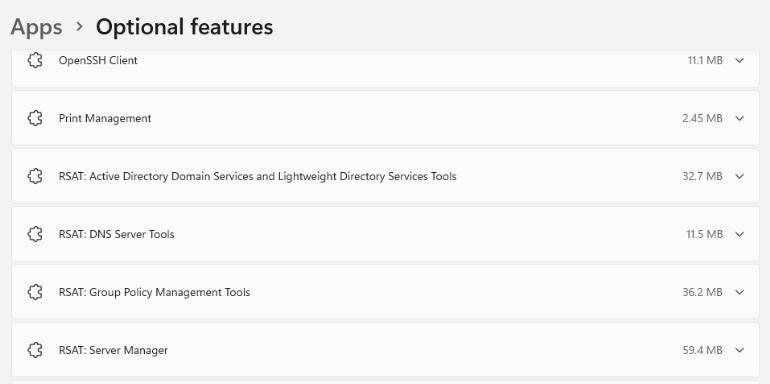
This computer will be used by the helpdesk domain user. Let’s install optional features to this PC so that a helpdesk account could manage some features
of the Active Directory. In Windows Optional Features page I have installed Remote Server Administration Tools (RSAT).
Windows 11 Client
Creating another identical Windows virtual machine would be redundant because Proxmox has a built-in VM cloning feature.
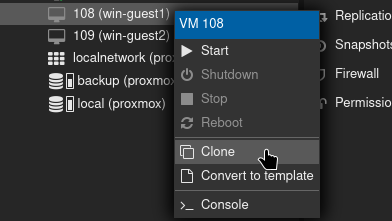
After running a VM cloning wizard I now have an identical Windows virtual machine with another VM ID. The cloned virtual machine is identical to the first one, including the same MAC address, Windows SID, computer name, and IP address. That is obviously not good and will cause issues later when joining computers to Windows domain.
The first thing I did before starting the VM was removing the Network device from Proxmox’s hardware page. After removing it I created the Network device again and Proxmox automatically generated a new MAC address for the VM’s network interface. After changing the MAC address I now can run Sysprep utility to Generalize a Windows installation.
Sysprep prepares a Windows client/server installation for imaging and can remove PC-specific information from a Windows installation (generalizing) so it can be installed on different PCs.
I have executed Sysprep.exe that is located in C:\Windows\System32\Sysprep\ and configured it to enter OOBE with the Generalize option ticked.
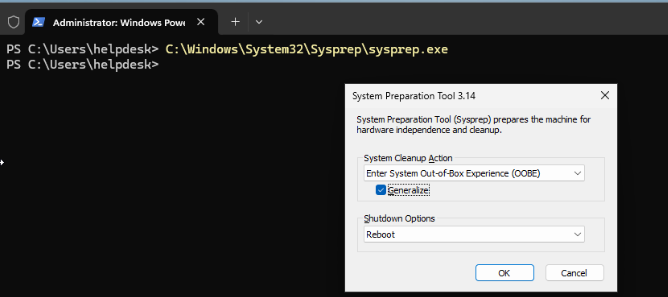
After it rebooted I have ran through the Windows OOBE setup.
Now I have three virtual machines: Windows Server 2022 and 2 generalized Windows 11 Desktop VM’s that are now ready to be joined to a domain.
Configuring Windows Server
I need to decide a naming convention for the domain controller and computers. In this project, the fictional company in the environment will be called: ver.lt.
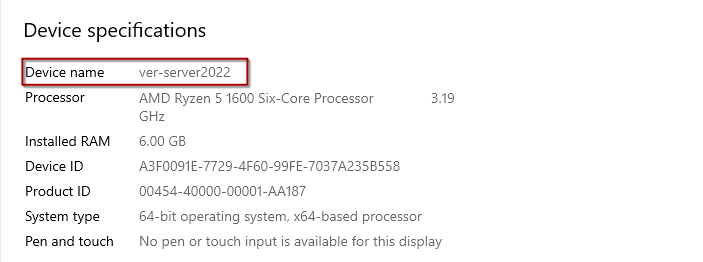
I will rename the server to a more memorable name. After changing the name to ver-server2022, I rebooted the server to apply the changes.
Installations and Promoting to a Domain Controller
In the Server Manager I have used the Add Roles and Features wizard and installed the following server roles:
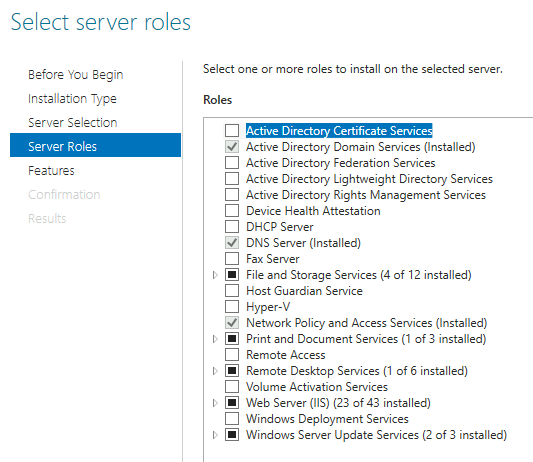
After the installation had finished, next step was the configuration.
I have ran the wizard to promote the server to a domain controller, created a new forest and named the root domain name to ver.lt.
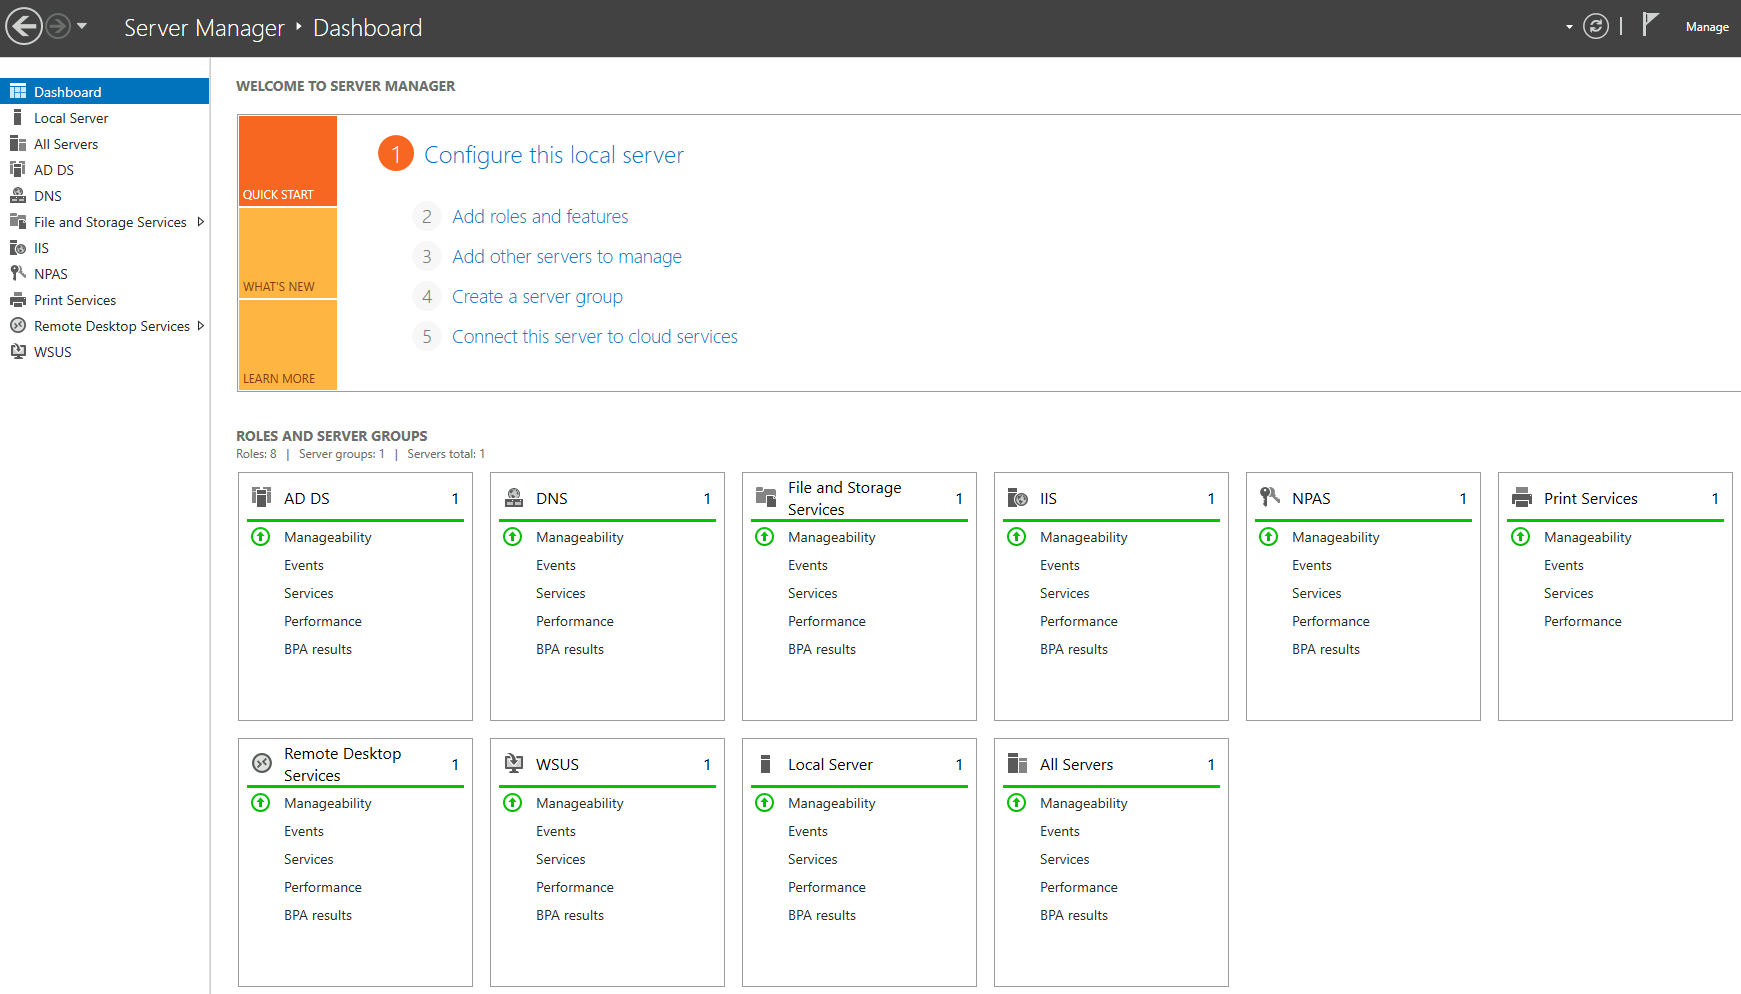
After the wizard setup and a reboot, the installation was finished and the server is now officialy a domain controller.
Creating OUs, Groups and Users
In Active Directory Users and Computers I have created the following OUs, Sub-OUs and security groups:
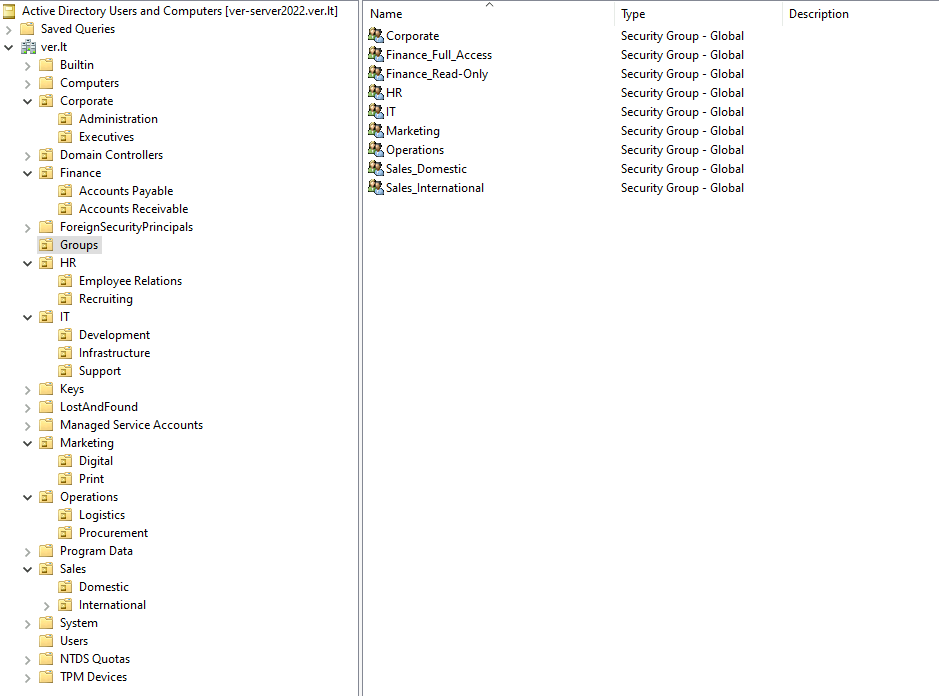
As shown, I created department-specific Organizational Units and their respective Sub-OUs for easier management.
The Groups OU stores all the security groups for different department users.
Helpdesk User
Now let’s create a helpdesk account and assign it appropriate permissions for managing the organization.
The helpdesk user will be a member of the IT group. To give the user the necessary rights to manage the domain,
we will delegate specific permissions to this group rather than giving full control.
- Open Active Directory Users and Computers (ADUC):
- Open the ADUC console (dsa.msc).
- Navigate to the IT OU:
- Expand the domain node and navigate to the IT OU.
- Delegate Control:
- Right-click the IT OU and select “Delegate Control…” to open the Delegation of Control Wizard.
- Click “Next” on the welcome screen.
- Click “Add…”, type “IT” group, and click “Check Names” to ensure it resolves correctly. Click “OK”, then “Next”.
- Choose “Create a custom task to delegate” and click “Next”.
- Select “Only the following objects in the folder”, check “User objects”, and click “Next”.
- Check the boxes for “Read”, “Write”, “Read All Properties”, “Write All Properties”, “Change Password”, “Reset Password”, “Create User objects”, “Delete User objects”, and “Modify the membership of a group”. Click “Next”, then “Finish”.
- Create the Helpdesk User:
- In the IT OU, right-click and select “New” -> “User”.
- Follow the prompts to create the user account.
- Open the properties of the newly created helpdesk user, navigate to the “Member Of” tab, and add the user to the “IT” group.
By following these steps, the helpdesk user will have the necessary permissions to manage user accounts and perform other helpdesk-related tasks without having full administrative privileges, maintaining security and control over the AD environment.
Since the helpdesk user is now configured, I will join the Workstation computer to a domain and use this user to manage the domain controller.
The first thing I did after logging into a local user was enabling the Administrator account and setting its password in Computer Management,
then logging out of the current account and logging in as Administrator. Then I removed all users except the local Administrator one.

Before adding a computer to Windows domain, changing DNS settings of the workstation is needed to point to the domain controller’s IP address, so that the computer could be discovered in the domain network.
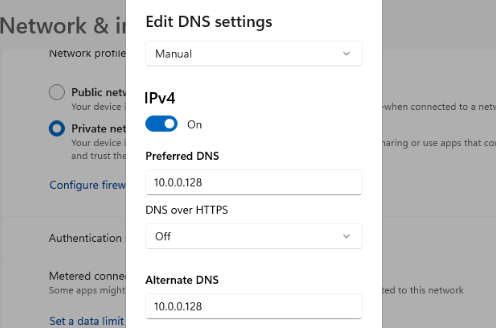
Let’s add this computer to a domain by opening Advanced system settings, then in Computer Name tab clicking Change.
I have change the computer’s “Member of” from Workgroup to a Domain and entered my DC’s domain ver.lt.
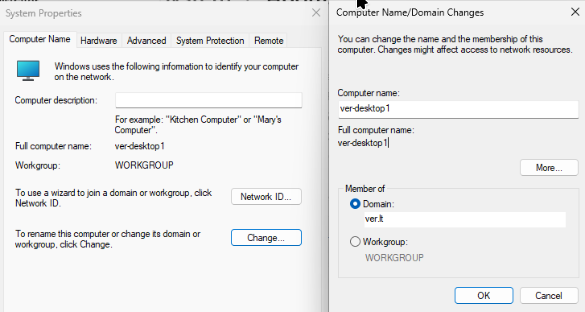
After entering the domain’s name, I get a prompt to authenticate with a user that has access to join computers to a domain.
I have entered the helpdesk user’s credentials, since this account is part of the Domain Admins group.
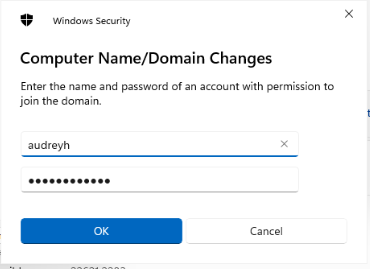
If everything was done correctly, a message will appear welcoming you to the domain, after which you will have to restart the computer to apply changes.
After a reboot, on the login screen I selected Other user, then entered the domain user’s credentials and successfully logged in.
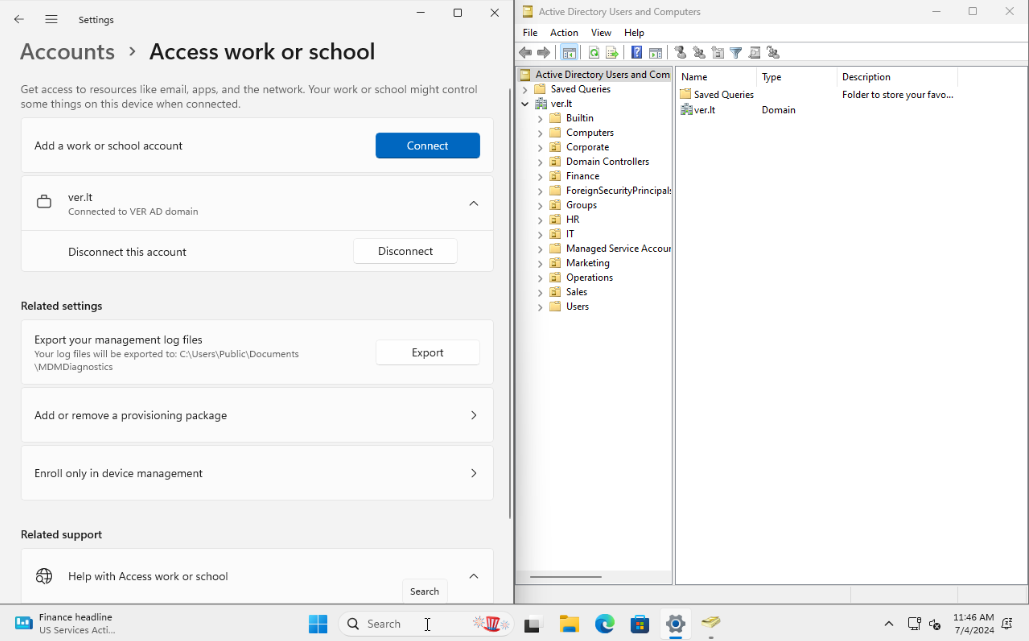
In Windows Settings, under Accounts > Access work or school we can see that the computer is joined to my domain and with RSAT
tools I can now manage Active Directory from this workstation with a helpdesk account.
Regular User
Suppose we need to add a user with limited permissions to the Sales department OU. I have created a user John Doe and moved it to the Sales Domestic Sub-OU.
I have also added this user to the Sales_Domestic security group.
Sales Shared Drive
For instance, if an entire department needs access to a shared network drive, this can be achieved. Sales OU has 2 Sub-OUs with each corresponding group: Sales_Domestic
and Sales_International. Let’s create a Shared drive that this whole department would have access to.
Creating a Share is done by opening File and Storage Services in Server manager and clicking New Share. Here you can see I have created a Share called Sales.
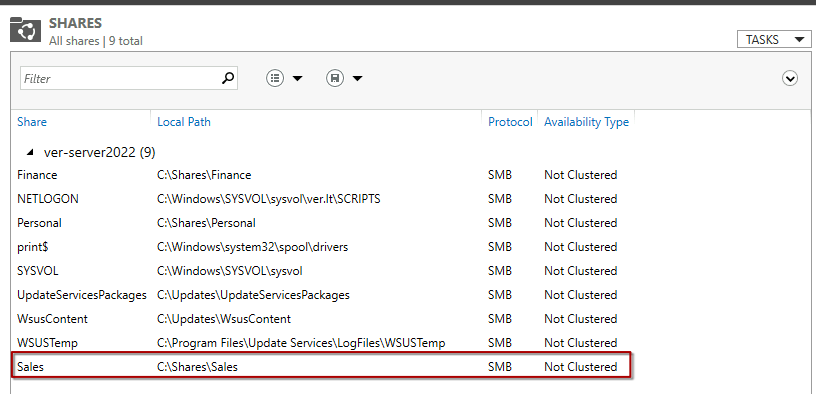
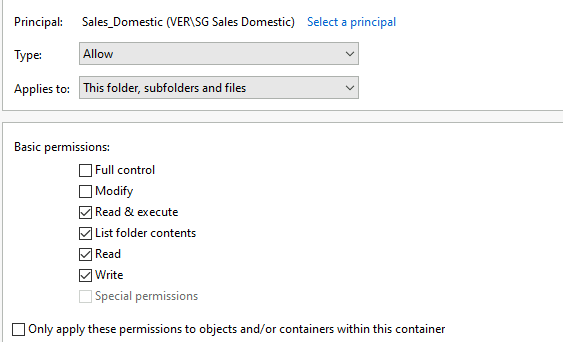
By default, all network shares are located in C:\Shares folder. In that directory, let’s right-click on the Sales folder and, in the Security tab, assign the correct permissions to the Sales team.
I have granted these permissions for the Sales_Domestic and Sales_International groups:
I have also disabled inheritance in the Advanced tab just to be safe and not mess with other groups. Here’s the finished security settings for Sales shared drive:
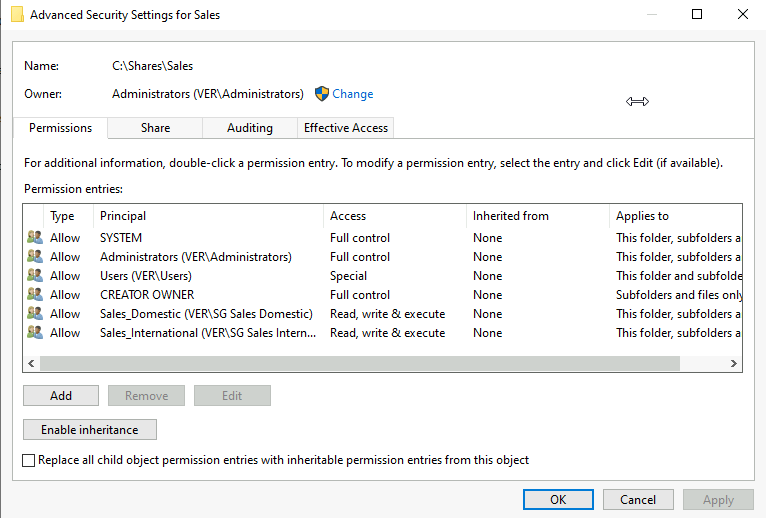
In the Advanced Security settings of a shared drive, Share tab, permission entries also need to be modified, removing the Everyone principal and adding the correct
Sales groups with their corresponding access permissions.
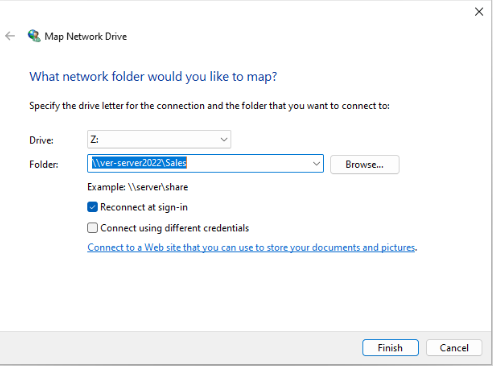
We can verify that the Shared drive is working for the Sales users by mapping a network drive:

Personal Shared Drive
I will create a personal shared drive that each Active Directory user can access in the Desktop folder. It is important to correctly set up the Share and
folder permissions so that each user has access only to their own shared folders.
Firstly, I have created a Share called Personal. I have removed the automatically created permissions except leaving SYSTEM, Administrators and CREATOR OWNER
and disabled inheritance. I have added Domain Users principal that only applies to This folder only and modified the permissions as shown in the picture.
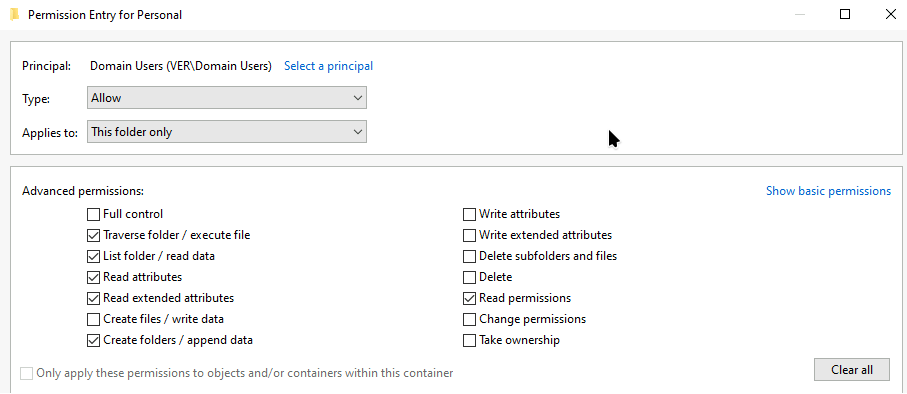
Under the “Share” tab I have removed the principal “Everyone” and added a new one: Domain users with Read/Change access.
Secondly, under the Share creation wizard “Settings” tab I have enabled the Enable access-based enumeration to hide the personal folders from other users which do not
have access to them.
Creating GPO for Folder Redirection
To redirect all users’ Desktop folders to a shared drive, let’s create a GPO in the ver.lt domain that applies to everyone.
After creating a new GPO we now have to edit it, inside User Configuration > Policies > Windows Settings > Folder Redirection > Desktop properties
I chose a “Basic - Redirect everyone’s folder to the same location” setting with “Create a folder for each user under the root path” option and
specified this root path: \\ver-server2022\Personal. Folder redirection is done.
Enabling Offline Files in the GPO is also a good idea, so users will still have access to their files even when they are not connected to the DC network. Inside User Configuration > Administrative Templates > Network > Offline Files > Specify administratively assigned Offline Files setting I have added the Desktop location with the dynamic %USERNAME% variable.
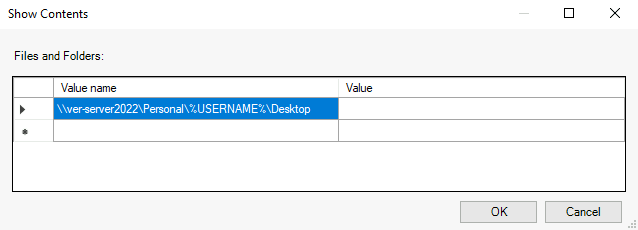
After the location was added I have enabled this setting and just like that the group policy creation is done.
Here is a report of all of the applied settings for this GPO:
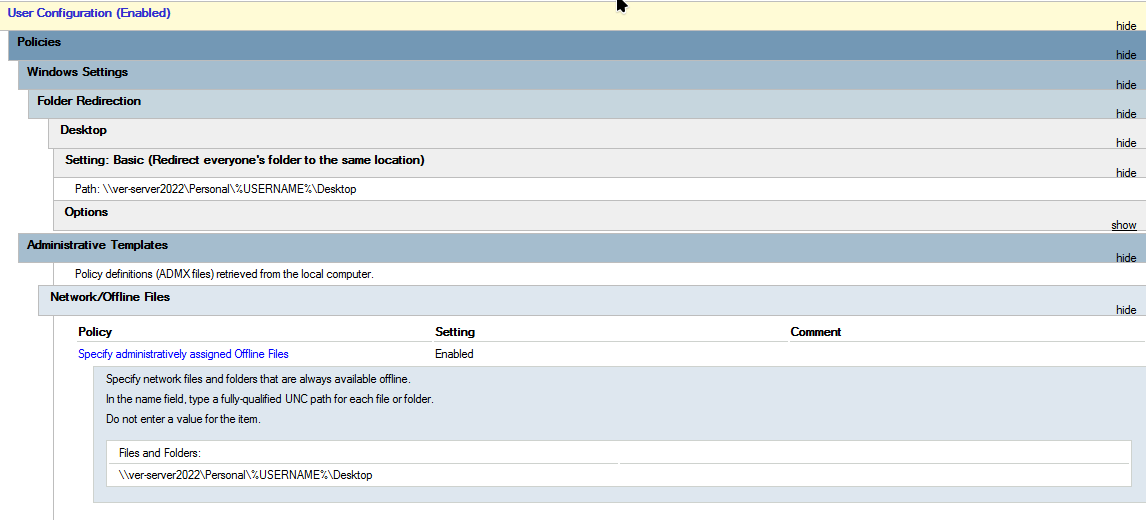
Now to verify that the configuration is working, I ran gpupdate /force to manually force a GPO update on the client computer.
I get a prompt to sign out to apply the policy.

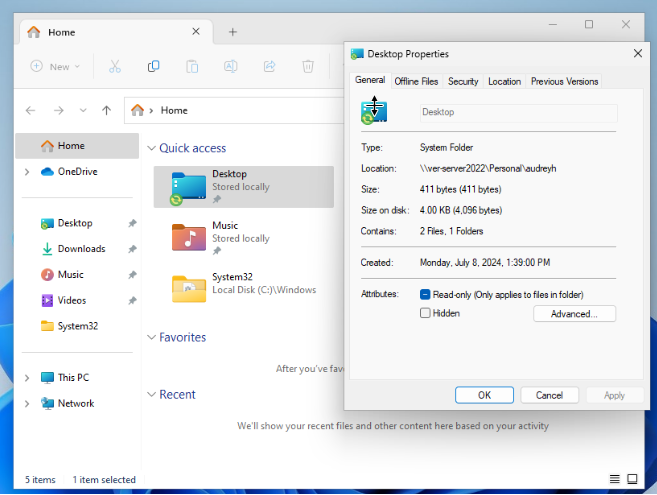
After logging in again, we can see that the Desktop folder has a green icon meaning that it’s syncing this directory and properties report that the Desktop folder’s location is indeed in a Personal shared drive.
Conclusion
In this post, we set up a Windows Server Active Directory environment from scratch, created and configured OUs, groups, and user accounts, and delegated appropriate permissions. This hands-on experience is crucial for understanding how to manage a Windows AD environment effectively.
This was by far the most interesting project that I have done, and it has significantly deepened my knowledge of Windows Server and Active Directory.